Friday, March 30, 2012

{Black} RoCKinG ChAiR

SOLD!!!
$60
Bigger Chunky Rocker
This piece would be great on a porch.  It was a nice day today, and I couldn't help but sit outside and rock-a-bye my little girl in it for awhile.  After we click the pics.  
We LoVeD iT!
This rocker would be {Darling} in a nursery too.

AFTER:


This is the last ROCKING CHAIR in my stash...so if you want it, get it now.  You never know when I am going to have another one available.


THE BEFORE:

Originally it had this scroll carved into it's headrest.  I filled it with putty and sanded it flush.  Easy breezie, problem solved.  After this step, I sanded the piece and applied the black paint.  Next, I sanded the edges here-n-there, and then added glaze over the entire piece.  Finally, sealing it with a semi-gloss poly.
*
...PeRfeCtiON...

Thursday, March 29, 2012

Featured on Apartment Therapy!!!!!!!


OMG...

I WAS FEATURED ON APARTMENT

 THERAPY!!!!!!!!!!!!!!!!! 

I can't believe it!!!!!!!!

 I'm going to say it again~~~~

FEATURED ON

 Apartment Therapy. 


Happy dance!!!!! 

NOW....Go see what else I'm up to. 

Eli's RoOm {BeFoRE} CaM's iNVaSion!!!

Look fast because it is no more...
The makeover is underway.  I have to say that this was a happy room.  I love the bright colors and black furniture.  The fan was my favorite.  In fact, the entire room was done because I saw the fan before our house was started and decorated the room around it.  I'm glad to say that we passed the cute fan and everything else (including the black furniture) to a cute family with three little boys in our neighborhood.  We moved Eli into this room when he was three.  He had to step out and away when Cameron started to destroy it.  
Who knew how much he would enjoy wallpaper removing.  
HE LOVED IT!!!
 Note that it should say ELIJAH in blocks but Cameron moved in before I took the pics.  When I was finished clicking with the camera, Cam removed everything and replaced the "kid" stuff with his MORE AWESOME stuff....ie: Scout/Motorcycle/Magic stuff (he wants to be a Magician when he is older).  So, look past the pics of him and such~OKAY?

 Even the light switch matched the theme.  I ordered the wallpaper online, and G and I installed it in our unfinished home.  We didn't even have running water or power to aid with the installation.  It was an adventure.  That same day, we hung up the chair rail and painted the bright colored walls.  Did I say that I was six months pregnant during this.  Yep.  It was also a cool summer day in July--NOT.  I can still feel the heat....


This {D}arling comforter was also bought online.  It was discontinued and didn't come with any other pieces. So, I found the pillows from various stores (mostly Target).  The large red one, I made.  We were living at my parent's home during the last few months of the build when I tackled the project.  I remember my Mom asking me, "You're still sewing that?"  Yeah, like she thinks I can whip something square with three straight pieces of fabric out like that.  Not.  It took me a while.  BUT it was perfectly finished for a very special child.


I found these old baseballs in my parents' shed.  
Loved that they were soooo old and used by my really old brothers LOL.
*Just joking boys*


 NOTICE the old bats for curtain rods.  Cool, right?  
Thanks to my Momma's hoarding habits.


I don't think this went with the "Theme," but the colors matched.  Also, he liked it, so it stayed.  This little train moves around often.  I noticed that it is in the pics of Hailey's room too.

 I bought these ball at Walmart just because they are {Baby} ones.

I'm still reusing these baskets in Cameron's new stuff.  I'll share later, BUT I love baskets for all sorts of sorting.  Don't you?

Awe, two of my kiddos.  
They made it in the frames because the girl at Sears Photo gave them "sport" theme props to hold.  Thus, they made it and the other two didn't. 
FYI, another kid has his pics in the bathroom because he was photographed with a yellow rubber duck.  Well, that room is filled with yellow rubber ducks.
 See how it works around here--it's got to "Go" with the stuff.

Tuesday, March 27, 2012

CaMEroN's "New" {F}urNiTUre

**We're keeping this ONE**
I found these two pieces 2 years ago and finally got around to painting them.  
They are going into My Oldest Son's "NEW" room.  With these two pieces finished~~I'm one step closer to finishing the room makeover.  YAY!   
.
.
.
Here are the BEFORE PICS:
I am loving the warm weather in UTAH!  So, is my husband 
(cuz i'm painting stuff, which means more crap out of the garage)
Truthfully, I was starting to go c-r-a-z-y inside.  
Plus, when it's warm, I get way more painted outside than in my paint booth.  
HaPpy DaY all the way around FoR EvERyoNe!  
.
.
AFTER a little putty and removing the hardware.....Then some sanding:   

NOW, for PAINT...
The color scheme for his room: dark teal/blue color and greys.  A hint of black.  
The rest of the room makeover is a secret  SO....."Follow Me" for the REVEAL!!!
 After the first few coats, I found areas of the cabinet that were buggin me.  
So, I had to add some more putty here-n-there, and even sanded a little more.
and then.......
STOP~~~I NEED CAULK!

I also had some larger than normal gaps showing in the doors.  
So, I added caulk in those spots.  
Here's the caulk I used:
Caulk is quite universal, so really U can use whatever U have.  
Just make sure that it is paintable.  
 NOTICE: One side is caulked and the other isn't.  This will polish off the restoration of the piece after I REPAINT it.
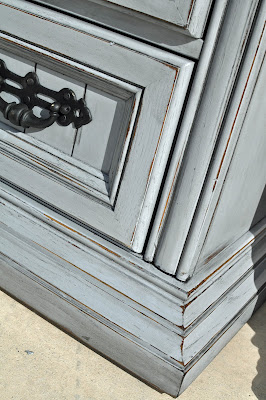
NOW for some distressing.  I used an orbital sander and sheets of sandpaper (120 grit--sometimes I use higher if the paint is thinner~~it always depends on the project and the desired effect).  I just rubbed on the high parts of the piece.  After I glaze the furniture, this effect will be AMAZING!

 I like to go down to the original finish on some of the edges.  On others, I go down below to raw wood.  I {heart} the dimension this adds to the piece.  WARNING: don't go soooo deep that the leveling gets all messed up.  Also, you can take a flat edge and chip here-n-there.
 Did you notice the hinges have paint on them?  I rubbed vasoline onto the hinges before painting.  Thus, after I am done glazing the furniture, I will wipe of the hinges and they will have just a bit of paint in their cracks.  I WANT THEM TO LOOK THIS WAY!!!  It is part of my distressed "LoOk".  If you ever paint a hinge on accident and you want an easy way to get the paint off, remove them from the furniture, put them into an old pan with water over them, boil for 20-30 minutes, and the paint floats/rubs off.  Good to know, right?

**
**
**SOMETIMES i DO AND SOMETIMES i DON'T**
**USE THE HARDWARE**
*
i JUST SPRAY THEM WITH THIS PAINT, 
SOMETIMES ALL THEY NEED IS A FRESH COAT.
Then, I lightly distress a few edges with a sanding block.
**
**
AFTER:
I glazed with black, added a clear poly coat and then the hardware.  What do U think?  {L}oving it?


~~~It's GROOVY~~~
I {heart} how the black glaze filled all of the groves in the pieces.  


NOTE: these will be in a {NEW} bedroom reveal coming soon.  SUBSCRIBE to my blog, so U won't miss out. 

Go create something, I am.
Related Posts Plugin for WordPress, Blogger...