This year I had one of my Boys say:
"I want to be a Scarecrow."
How do you make a Scarecrow?
Here is what I did.
It wasn't hard, and took about two hours to complete. He wanted it to look like something we would have on {O}ur porch. So, if it were on {My} porch-it wouldn't be scary~but cute. His plan was to blend into the decorations and then scare unsuspecting TRicK-oR-TreATers.
The problem, he is a young teen and it had to be somewhat scary OR he would be heckled by the other boys. Right?
So...........
I went to my craft supplies. I knew I had stuff from the year before when I made Scarecrows to sell {Maybe, I'll do it again Next Year}. Anyway, I had everything but pants. So we found those at the D.I. {A loCAl ThrIFt STorE}.
Then............GOT out my favorite weapon~
~THE HOT GLUE GUN!!
NExt: I added Raffia on all of the cuffs w/the glue gun. I just added gobs here or there. It didn't have to be perfect because he was a scarecrow. Also, glue some raffia hair to the hat and add a dab in the pocket {for cuteness}.
I knew after a few parties, it would fall off here and there anyway. Plus, sometimes, I found myself crushing the raffia to add were I missed a spot.
EASY REMEMBER!
Then I did the patches. I DID NOT SEW these on.....I glued them too. After they cooled, I added the stitch detail with a sharpie marker. AGAIN, Easy & Fast.
Just add at the elbows, knees, and front pocket.
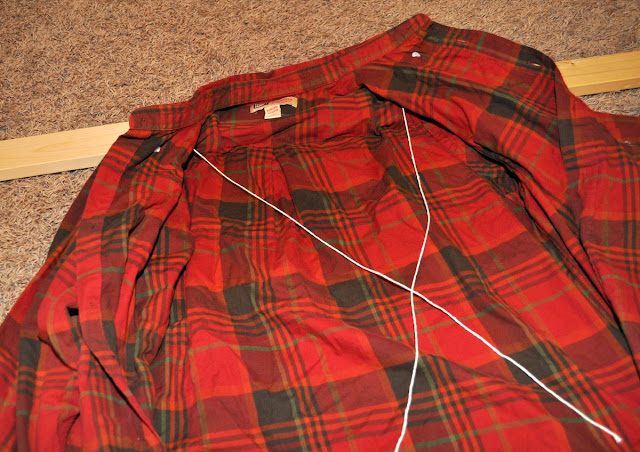
Now, for the board across his back. I found one in the garage, it was a 1"x4"x36" pine. Cut a slit in the back of the shirt were there is two layers of fabric. It worked well to hold the board in place. Before pushing it through, I drilled two holes at his shoulders. Threaded a small string through to tie to his britches. Then pushed it in and threaded the string into another hole I cut that would lead to his belt loops.
Check out the pictures to understand better.
{It's kind-of a redneck approach BUT who cares-You aren't wearing the wedgie, RIGHT?}
These are his REDNECK suspenders ~~HA HA
or WEDGIE!!! YIKS
While the glue gun was still hot, I added the crow. I had to drill the board were he sat-so I could thread the wire on his feet through it. If you don't do this, the crow will fall of at the edge of your drive way the minute they head out for candy.
ANyWAy, I glued some moss stuff at the bottom to cover the mechanics up. My son, asked what that moss was for and I said, "Scarecrows stay put in a field....You don't think birds build nests on them? Did you want poop down your back too?" We laughed. I love him.
Lastly, a scary mask {Ya, one less face to paint this season}. This was from an old costume from a few years ago. Worked good and it made it appropriate for a teen. I tied an old rope from scouts around his waist and add the bandanna around his neck. He will have boots on that night.
Completed the look with gloves to grab you with. REMEMBER, his arms aren't connected to the board. He has to hold them up to really look the part.
If you were doing this for a girl, I would find a pink flannel and paint her face cute.
I promise this was easy!!!
HAPPY HALLOWEEN
Here are the kids heading out for the night.
I love that my Daughter is a cute kitten with monster arms in the air.
RAAAwww.....
