Sunday, February 26, 2012

{This} little Girly TuRNeD TwO

To celebrate her birthday, I wanted to share her room today.
{To see more rooms in our home, look to my side bar and click on pics under "Home Tour"}
After four handsome boys~~~WE GOT A GIRL!!!
Her Awaited arrival.
***THE PRINCESS ROOM***

I was featured here!!!!
www.sweetcharli.blogspot.com

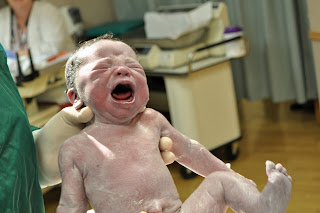
On February 26, 2010, our family welcomed the arrival of our baby girl.  Hailey Catherine.  She is the only girl in a family of four other brothers.  SO, you can imagine the excitement of a GIRL!!!  Can I just say, LOTS and LOTS of pink.  I started decorating her room shortly after Christmas, and finished two hours before labor.  It truly is a site to see.  Her room brings to us, and her, great happiness.  The colors are soooo bright and PINK.  The only colors I left out of the room were black and red.  These few colors have made it in by way of hair bows and clothing though.  Look around for your own inspiration.  

P.S. I hope you all get to enjoy the gift of a little girl...


These where once napkin ring holders from Tai Pan.  I cut the wire and twisted it to fit.  If you live in Utah and don't know about Tai Pan, you have been living under a rock.  Go quickly to the link below and start driving there.  You'll thank me.
Not the typically mobile.  MORE fun and can be used later when she is bigger for a "doll".  
Again, found at Tai Pan around Spring/Easter season.

Hutch 411.
The bottom is from http://www.rcwilley.com/  the top was found at a scratch and dent furniture store.  Sorry, this is a one of-a-kind.  Anyway, we placed the two on top of each other after adding more crown to the top and painting them the same color white.  We also, had to take the back off and add bead board.  I though that it was a nice compliment to the crib (repeating the stripped look).  The bead board was painted with bubble gum paint and glazed just like the crib.  Note: that the bottom of the hutch has white peg board on it.  We can't wait for Hailey to write little note and stick on it.


{DaRLiNg} right?


Here are some before/during pics.
It all started with these FOUR boys and still no girl.
Soooooo we didn't know if we were done AND we weren't.
{Now we are}

I'm almost ready BUT the nursery wasn't....
so with little time to spare, and feeling great.  I got started.
REALLY I waited this long.  I had to get through the holidays and she wasn't coming until the end of February.  That's enough time, right?


 {N.e.s.t.i.n.g}

Awaiting her arrival.  It's was 11:00 PM. 
&
Then.... She came @ 12:20 A.M.


~HER BIGGEST FAN...Daddy's {Little} Girl~

If U know us personally, U know that SHE is in CHARGE of us.  
She is really fun and says funny things.  She likes {pink} clothes and things BUT no dolls.  WhAt?  I know.  

I am getting ready to add some bigger decorations to her room so HAVE one last look before she gets her "BIG GIRL" bed and accessories.  


I linked this posting here...........


Wednesday, February 15, 2012

{L}iKE ORanGe?

~~SOLD~~
Truthfully, it wasn't ever available to buy
it's for my son's "orange" room.
OrANge **RETRO** DrEssER

{B}efore:
I had to putty some damage here-n-there...
Then after some sanding, I sprayed it with a bright orange.  Oh MY GoSH...it was too BRIGHT, so I sprayed again with a darker orange.  Next, I did some distressing and glazed it.  During the distressing, the BRIGHTER orange popped out, and it added a cool effect!!!
To complete the dresser, I distressed a bit more, then glazed.  I glazed all sides of the piece and all the drawers.  It had a funky smell, and by doing this, it looks and smells new again.  I added some modern drawer pulls after coating it a few times with some poly.  It turned out {A}MAZING!!!
Well, my son wishes it was the "before" glazing color BUT I can't live in a 
CAUTION ORANGE ZONE.

NOTE:  this dresser was bought and painted with one of my sons in mind.  His favorite color is orange.  EVERYTHING we buy for him is orange.  So, when I moved all my boys from their old bedrooms into other bedrooms (we didn't move, just shaking things up around here), they all get to redecorate.  I did it for them, not because I was in the mood to redecorated -wink, wink---AnY HoW, his room will have ~~~ORANGE as an accent.  It should be interesting, stay turned for the reveal..........
I'm redoing two big boy rooms, so fun stuff coming~~I've been busy!

~~THE AFTER~~


I love the two shades of ORANGE that the piece has.  It makes me happy when a mistake turns into AWESOMENESS {is that a word?}  I can't wait to get started on the desk and chair set for this room.  This son just moved out of a room he shared with his older brother.  The room has dinosaur murals on the walls.  I didn't want to paint over them but the two older boys were too old to live among dino walls.  So, I switched their rooms out with the two younger boys.  The younger boys are loving the "sharing" experience and talking during bedtime.  {The two older boys are often heard talking through the vents at night.  Their "new" locations are on top of the other~making it possible.}

Did U notice the writing on the chalk board? 
Again, congrats to G for placing second in his class this weekend.  I'll share a few pics of our race day.  
The weather was sooooo warm in Hurricane (St. George, Ut area)......
Remember: they ALL are dirty w/helmet hair~~~

LOVE my BOYS XOXO

Can U guess which son like ORANGE?

Cameron & Gavin's start...


Hubby's start...the best part is when it is completely silent and then they start up their bikes in an instant and peel off.  Well, my favorite part, second to them coming across the finish line uninjured with a dirty smile.


My hubby, 125P.


#17 finished #4 in his class.  
He got a trophy!!!


SO, as you can tell, the redecorated rooms will have some type of motor-cross/cycle theme.  At least, a big spot to display their trophies and pics.

Got to get going and paint something...VROOOM, VROOOMMMMMM....


I linked this project to........

Thursday, February 2, 2012

Icy Cold Wreath


Something to encourage the snow.....
Yes, I said snow!  
At our house, we LOVE to ski (even though we don't do it as much as we would like).  So, when it doesn't snow, we are sad.  
I know the weather is wonderful today but I wanted to share this {Icy} Wreath I made.  ALL parts were cheap--like thrift store/clearance cheap.


I saw a wreath similar to this one at Tia Pan this year.  I didn't want to pay the {$} SO.......I created a version of my own.  I found the little trinkets at a thrift store {DI} or on clearance {Tia Pan}.  I sprayed them all silver-if they weren't or had scratches. Then I went and found an old "Lyle Dabb" wreath.  

For those of you who don't know, he lives locally and creates "stick/natural" wreaths.  He only charges $35 ish.  I'll go take pics of his roadside stand and post them later.  I might even tell you his address.  Anyway, he sells everything from pumpkins to cats.  He's a farmer. 
 I love that in the fall, when you head over there, 
he dresses like a scarecrow and lays out on the pumpkin pile, then..............
JUMPS UP @ U!!!

Back to wreath talk~~~~~
After Christmas, Walmart had these {P}oKe LoOKinG things for 50 cents.  I bought an armful and used them to build the wreath.  I wanted them to have a "FrOSted EveRGrEEn LoOK" BBBEEEcause it's cold. 
That's from BARNEY, enough said.

THE PROCESS:


 In these pics, you can see that I just poked the pokes into the wreath.  I didn't hot glue them into it because with the stick wreath, the glue would drip EVERYWHERE and melt my table cloth.  What I do is get the wreath how I want it, then wire everything together.  I just take about 8 inch pieces of thin floral wire and strap everything down.  You have to do this, or it will fall apart, right?  Also, if you don't, it will sag when you turn it vertically.  Plus, it is going on a door.  So, every time the door is open, it would drop pieces onto the floor.  NOTE, when doing this (using wire), hide it whenever possible.  Tuck it under other stuff/decorations.

 Next, start adding the good stuff.  I just eyeball it.  Then I wired those in too.  In this step, I did hot glue some of the elements that just couldn't be wired.  Also, I like to hot glue stuff where I want it.  For example, when the wind blows, I hate to drive out of my driveway and notice that something was blown backwards--mostly because you know I will forget to turn it back the other way for 3 or 4 days.  Meanwhile, my "driver-byers" are missing the good stuff.


{R}emember when placing things into the wreath or any decorating (on shelves, etc.)~~~~the odd number rule.  You should put 3 of something, rather than 2 or 4, in a project whenever possible.  It helps balance out the project and makes it more appealing to your eye.  With that being said, in this project that was hard to do because I bought things on clearance/salvage and I didn't have any control over how many I could buy.  In those types of situations, you have to stand back and look and judge placement.  For example, don't place two "heavy/bigger" items too close to each other etc.  

Below is the back of the wreath with the wire showing.  
Yuk right?  
Good thing I'm not hanging it on a storm door.  In that case, you would be hot gluing floral moss to the project.  But in this case, leave it.


Now, I'm going to say it~~Don't hate me!  
Let keep our finger's crossed that we get snow now that this is hanging on my door.
FYI~I think I am the only person who wants snow in our neighborhood.  Yesterday at church, they were all talking about getting their gardens ready....hum.

Oh yeah, it's Valentine's Month SO......this is how I incorporated the 
"Winter" season with "V day" on my porch.....


{L}ittle Silver Tree
 **One last project that I did the same day**

I found this little silver tree at a thrift store (DI).  It didn't have a base on it.  A few days later, I found this larger silver tree at "The Secret Haven" in Kaysville on clearance.  It was is perfect condition.  I thought to myself, "They would make a darling set."  Bought.  

So, while my table was dirty and I was using silver spray paint, I created a new base for the little one.  I used a mason jar lid--{C}lever huh?  If you look and the bigger one, it also looks like the manufacturer used a mason jar lid~well kind of.    Sprayed the lid silver while spraying the wreath trinkets.  And then, I drilled a hole in the top of the mason lid.  Next, I cut out a circle of pine to hot glue into the bottom.  Lastly, I glued the tree into the center of the hole and added some wreath crumbs for texture.  One last coat of silver for the hot glue and crumbs.  Then, Taa DA!!!  A darling {F}rosty tree set.  
Cute, or what?


I linked this posting here....


Related Posts Plugin for WordPress, Blogger...